How to fix your sagging floors without jacking or replacing posts and beams
Sagging floors are a common problem for homeowners, especially if you own an older home. Common complaints include a 'bounce' on the floor, or squeaking or creaking boards when you walk on them. These problems can be annoying, however sagging floors can be easily rectified without the need to install sister joists or replace the posts and beams.
Reasons for sagging floors
There are many reasons why your floor may be sagging. To make sure you don’t have any significant underlying issues under your home, it pays to inspect under the floor if you have access via a basement or crawlspace. Problems arising from excess moisture, damage from water leaks or pest activity need to be addressed before doing any work.
More commonly, over time with dimensional lumber, the timber shrinks because of moisture or aging, which results in a floor that is bowing down or bowing up. Joists that are set at the maximum spanning distance for the weight they must support or extra weight stressing the floor joists are also common contributing factors to why your floors may be sagging or squeaking.
The good news is that these issues can easily be fixed, and in a way that is just as effective as installing a steel beam under your bouncy or sagging floor - but without the expense.
Clever fix for sagging floors
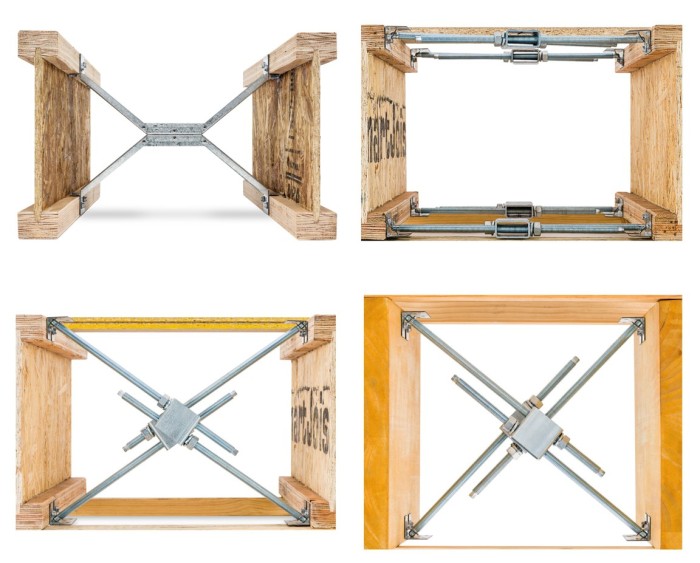
Installing an adjustable floor lock system is a quick and easy fix to sagging floors by str
aightening the joists and transferring the weight back to the outer wall. This system of bracing forces joists to work together spreading the load to the adjacent joists and to the outer wall.
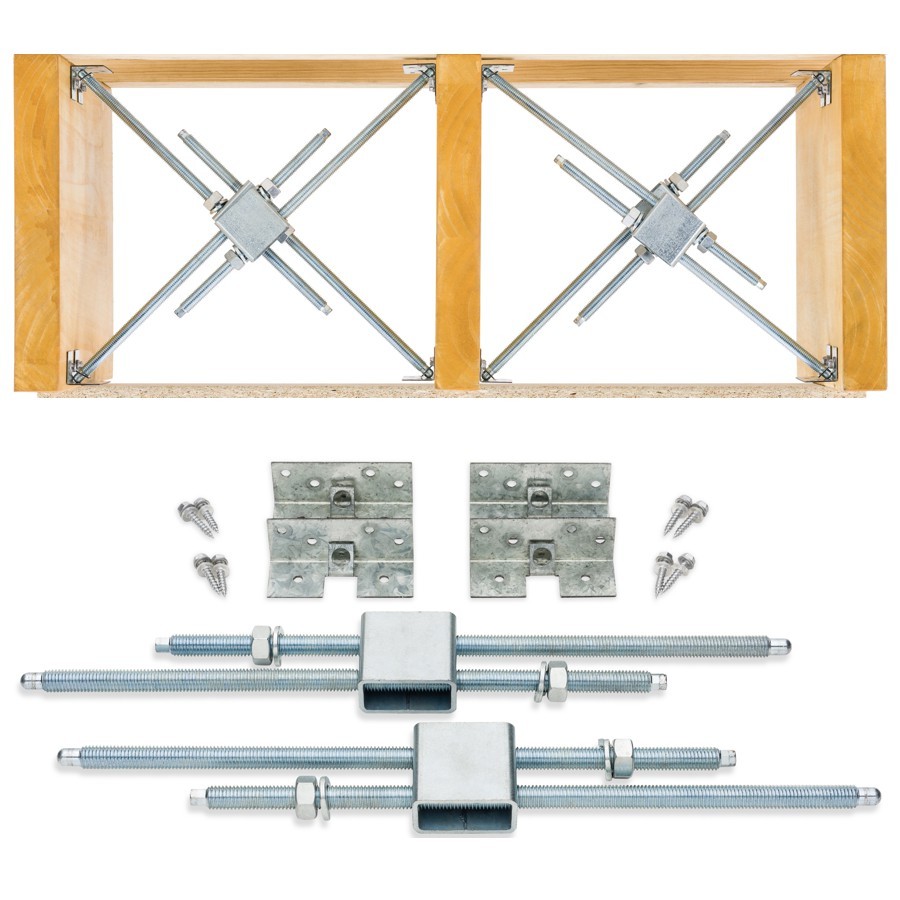
Burmon Building Products patent pending Adjustable Floorlock Brace has revolutionized the way contractors and DIYers fix bouncy floors.
Mounting brackets are fixed to the joists with two high-capacity threaded tension rods inserted between the brackets to brace the joists. One end is rounded for inserting into mounting bracket hole and the other end molded for a 5/16-inch hex driver.
A heavy duty square threaded tension rod housing unit is engineered to support the tension rods as they are wound in and out.
The adjustable floor lock braces together once the correct tension is set in between joists, thereby eliminating all floor movement and squeaks.
All you need is a drill to fix the mounting brackets and 5/16-inch hex driver, socket wrench, or spanner to tension the braces.
 How easy is it to fix a sagging floor?
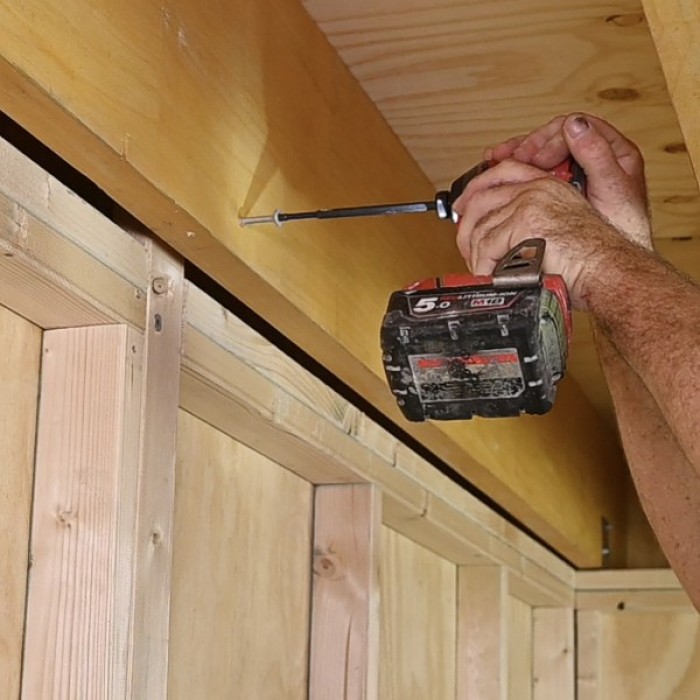
You’ll need to access the bottom of the flooring either from a basement or crawl space. Before you start installing Floorlock, you first need to prop the floor from below to lift the floor to level.
Once this is done, the connection between the outer wall and the end joist needs to be strengthened. This can be easily done using an impact drill and the provided screws.
Then use the supplied bracket template to mark out where to secure the mounting brackets. The template provides guidance where to fix brackets for 6-, 8-, 10- and 12-inch joists.
 Mark each side of the joist where the arrows are top and bottom, which will give you a perfect line for your brackets. Mount the brackets a quarter of an inch up from the bottom to allow for any movement.
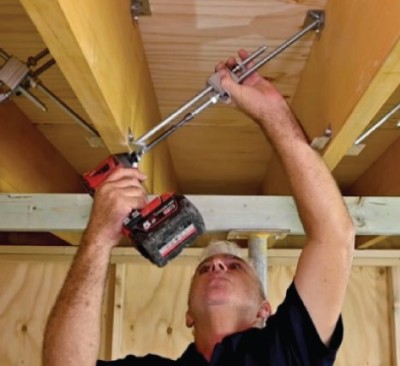
Next, place all adjustable lock systems in position ready to be tensioned. The end of the tension rods are 5/16-inch tip so you can use any common socket wrench, spanner, drill or impact driver. Just tighten each rod up to hold them in place ready to be tension to lift the floor.
When all Floorlock tension rods are in place, start tightening the rods from each end closet to the outer walls. Start tightening from each end beginning with the end joists and working each side into the centre. This will gradually bring the load from the outer wall to the centre to lift the floor.
Watch our video to see how easy Floorlock is to install
The Adjustable Floorlock Brace System
Burmon Building Products patent pending Adjustable Floorlock Brace comes with 10 sets, which consists of 20 individual tension rod bracing systems.
It includes 20 Individual fastening brackets for top and the bottom to affix to joists, including a template which will demonstrate where to place to mount on 6-, 8-, 10- and 12-inch joists.
All required screws for the mounting brackets are supplied as well as an installation guide. A ratchet spanner is also supplied which will let you adjust as you need to the correct tension and size.
Watch our What's In the Box video.